Hello winter! As winter has arrived with snow, cold temperatures, hats, gloves and jackets, we can do a wintery craft activity. We are going to make a snowman.
It may sound difficult as we don’t have much snow and our temperatures are not very low to keep snow from melting, for that reason we will need the following materials and tools:
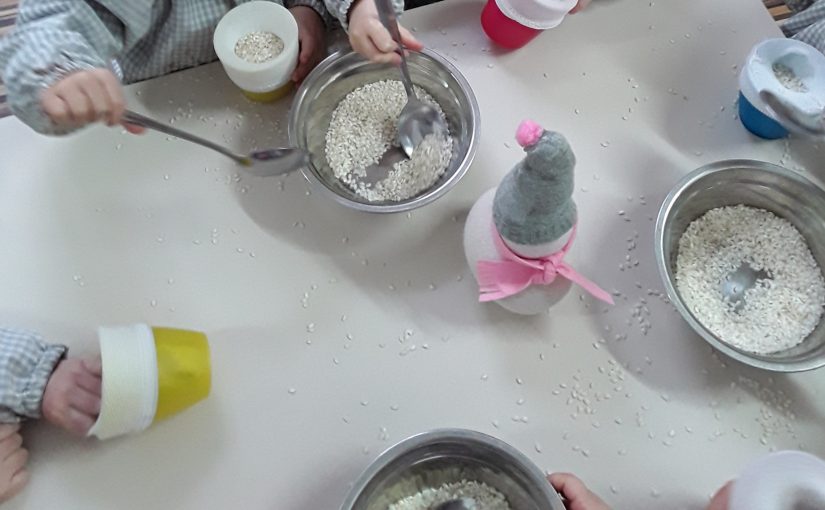
- 1 white sock
- Rice
- An elastic band
- A colored pom pom of your choice
- A small piece of colored ribbon
- 3 buttons
- A piece of black and orange felt
- Hot glue
- A funnel
- A spoon
- A cup
- Scissors
First of all, we will place the sock inside the cup making sure that the socks opening is at the top of the cup. With the spoon, we introduce rice and we make sure it’s quite packed, so your snowman is fat enough. Be careful not to overfill it. It is best to fill it ¾, as you need to be able to close it by tying a knot.

Once the sock is tied up, you will need the elastic band to divide the sock into two, to create the snowman’s figure. Make sure you bottom part is bigger than the top. Once the measure is correct you just have to place the elastic band.
Where the knot is, you will see that there is a leftover bit of sock. That’s going to become the hat! You just have to turn it round and place it around the head. With hot glue, we place the pom pom on top of the hat and the ribbon around the elastic band making sure it looks like a scarf.

Now it’s time to make the eyes and the nose. Cut 2 black circles of felt for the eyes and one orange piece for the nose and glue them on with the hot glue. We also glue the 3 buttons and we are done!

Here is our little snowman! During the process we like singing the snowman song, createing a cozy atmosphere.

